Final Presentation
Final Micro Scene Turntable


____________________________________
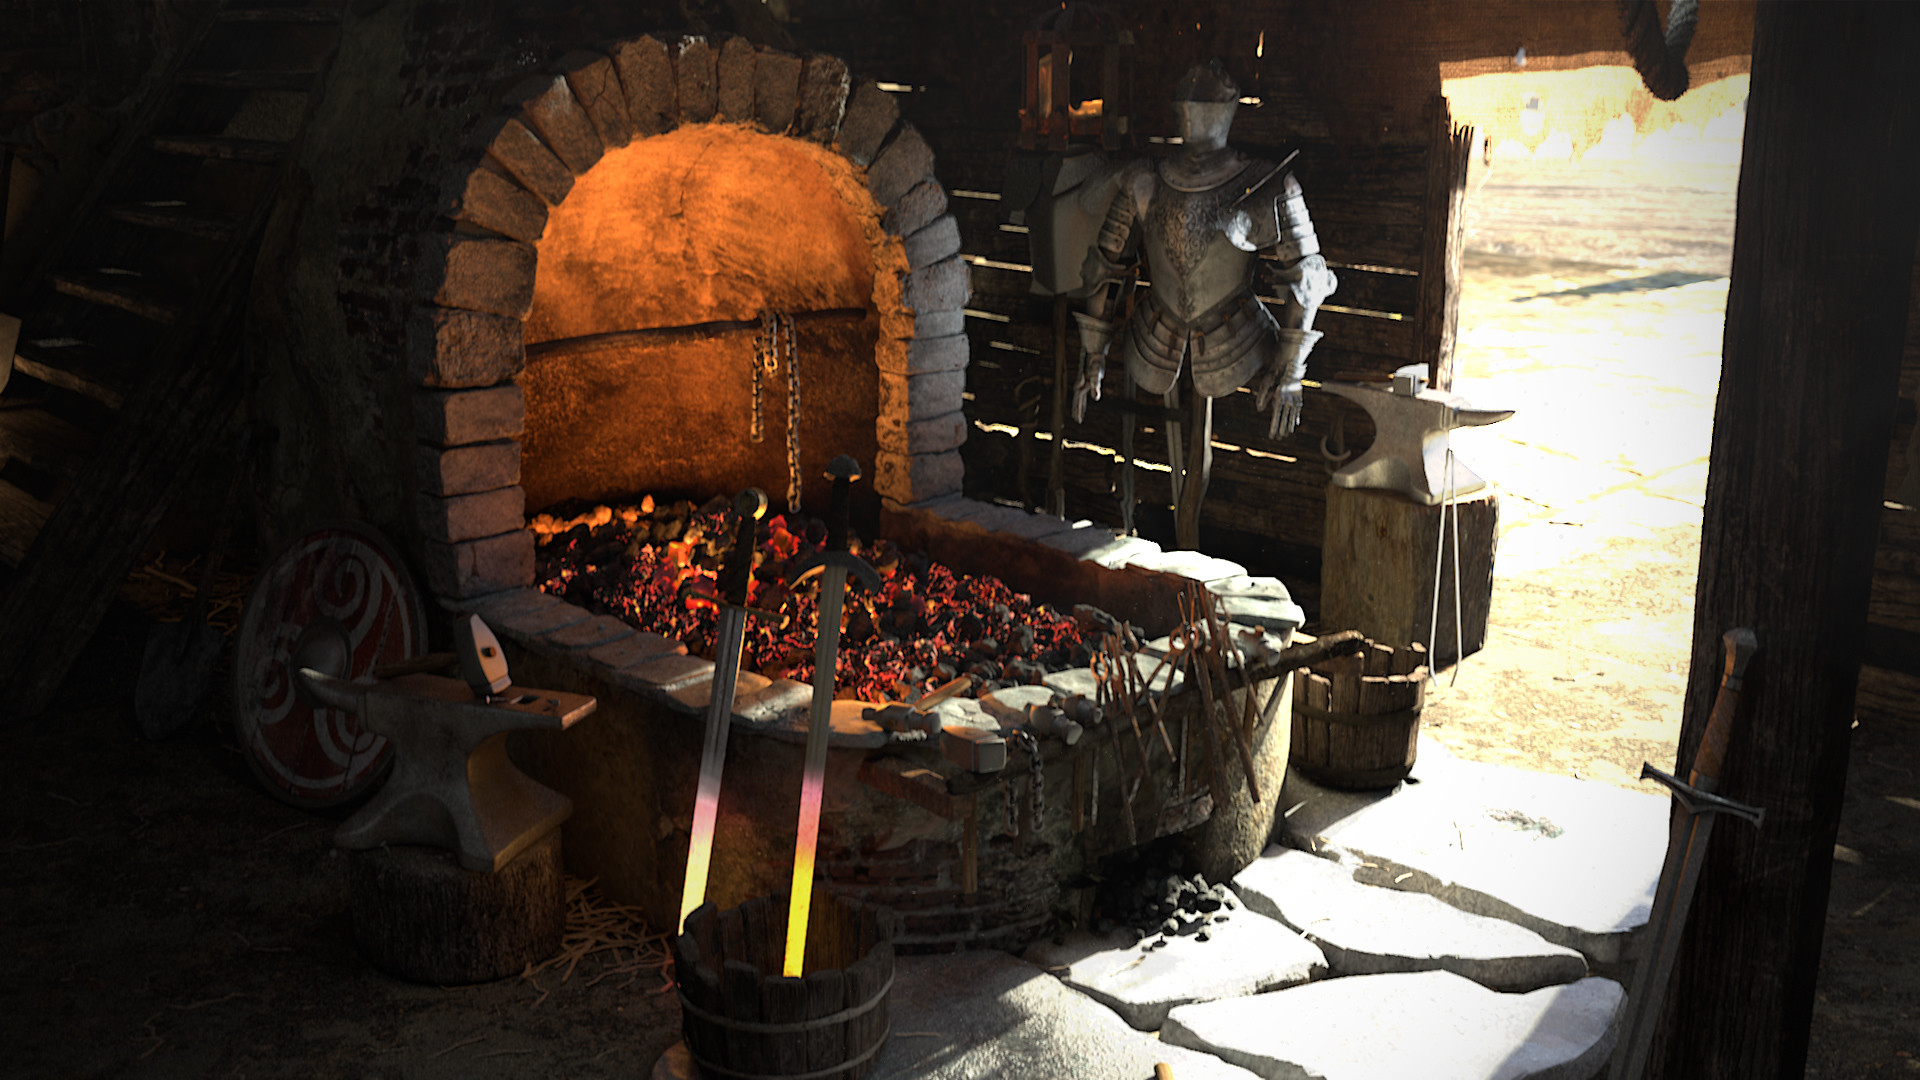
Final Black Smith Scene


____________________________________
Final Project Weekly Progress 6

Final Project Weekly Progress 5

During the past week I wasn't able to get a lot of texturing done due to my other projects needing to be turned in early but I was still able to complete two textures and have them ready for marmoset.

I have slowly started to put objects into marmoset and bring in the texture maps of the objects. I still need to mess with some settings and refine what I have already. I really like how a lot of turned out and have been getting good feedback from classmates on what to change or what they want to see more or.

____________________________________
Final Project Weekly Progress 4


____________________________________
Final Project Weekly Progress 3

For this time, I worked on a lot of the smaller objects and wanted to get them UV'd and ready for texturing. I have decided to change how I am doing the scene. I am no longer UVing and then going straight to texturing.

I have decided to UV all the objects before I start to texture so I can keep programs closed and give the most details to the objects without spending my whole time on just one item. I have created another substance designer texture that I am using for the leather handles of the items in the scene.

Final Project Weekly Progress 2


____________________________________
Final Project Weekly Progress 1


____________________________________
Front Loader
Final Micro Scene Turntable

After adding in the lights and the glow around the forge I think the scene came together rather nicely. I also added some metal inside the forge. The fog effect got what I wanted for a dark and musky scene where I imagine it being located deep in a forest. Taking the suggestions from my peers and professors made this project exceed what I thought I could do.
This is a short video of my scene in Marmoset Toolbag and was able to add a turntable so that the whole scene rotates and able to see the complete scene that I made.

Throughout the final I have progressed well and was able to really enjoy texturing models as well as creating some of my own. I still think that there could be improvement on the scene like trees and foliage to make the scene look more realistic. Besides that was a great time making it.

The complete programs I used were Maya to UV and model the objects in the scene. I used Substance Designer and Painter to texture and give the realistic look to the objects. Lastly I used Marmoset Toolbag 3 to set the scene up with lighting, fog, background glow and rendering it out.

____________________________________
Final Black Smith Scene

For this final week I wanted to really refine what I had and make the post effects more realistic and make the scene pop. These first images are before I add lights and fog to the scene while also changing the background for a more seamless transition.

At first I was having trouble with my scene converting back to its original state once I would have maps to certain objects. So i just scraped the scene and created another copy of the object without moving things inside of Marmoset and just in Maya. This seem to fix the problem and wouldn't mess up the terrain texture.

Once I added the after effects the scene really came together and made it look realistic and definitely captured what I was trying to accomplish. Besides the few texture errors and deleting history, this came out super nice and proud of what I have.

Final Project Weekly Progress 6

For the final week I have been refining and adding small details to the scene to fill it up and get rid of a lot of negative space that is around the scene. I cut a lot of the terrain down to make the scene smaller while adding more random parts and tools already in use in the scene to give it more of a work space feel.

I still don't like the lighting happening in the scene and hope to be able to find the right angle I will like to take a capture of the scene. Overall, I am really happy with how the scene came out and refining what I have is what I am focusing super hard on and want to make it a great scene to look at.

____________________________________
I still don't like the lighting happening in the scene and hope to be able to find the right angle I will like to take a capture of the scene. Overall, I am really happy with how the scene came out and refining what I have is what I am focusing super hard on and want to make it a great scene to look at.

Final Project Weekly Progress 5

During the past week I wasn't able to get a lot of texturing done due to my other projects needing to be turned in early but I was still able to complete two textures and have them ready for marmoset.


Final Project Weekly Progress 4

This week I was able to finish all the models that I will have in the scene and ready to get the majority of the textures done on the models and have it ready for marmoset.

I did have some troubles with getting some of the UV maps to align correctly inside of Substance but just had to take off UV protection and use Tri-planar to get the edges of objects to not have a huge crease running down the sides.

Other than that just trying to finalize what I have and just add minor details next week. I would like to be able to have this in marmoset by the end of next week so that I can fix the lighting and camera too something that I will like.

____________________________________
Final Project Weekly Progress 3


I have decided to UV all the objects before I start to texture so I can keep programs closed and give the most details to the objects without spending my whole time on just one item. I have created another substance designer texture that I am using for the leather handles of the items in the scene.

I would like to add the leather texture to the handles of the hammer and swards that were given to us as models. I still need to finish up a few more models and get them ready for next week which will be mainly Substance Painter and getting the textures ready for the final.

____________________________________
Final Project Weekly Progress 2

During this week I wanted to get started on the shed and the terrain for the micro scene that we are doing. I wanted to keep the terrain simple but give it the illusion of having depth and more that what can be seen. I want the audience to draw themselves inside the scene and imagine what the rest would look like given the items and textures around the scene.


I also wanted to work on the shed that would house a lot of the objects and textures to show that this was the work space that the blacksmith gave themselves. I have been using my substance designer texture I made for wood and have been trying to incorporate it more into the scene. I still need to work on more textures and UV a lot more models over the weekend.

Final Project Weekly Progress 1
For our final project we our to create a blacksmith's forge station. I wanted to do a more outdoors forge with the furnace and forge being the main stage with the chimney having a lot of structure support with a over hang around the whole forge. I found some pictures that show kind of what I imagine of what I will be doing.
I like to think of this as its own building not just something that is attached to the house or built inside of one. I wanted to capture the real power and energy that is needed in when working with metals and other raw materials. We have to use 10 models out of a list of 20 or so models. I picked the most essential models to make sure people could tell it was a forge.
I have not figured out the color scheme but I want it to have mostly a dirt or rock floor. Woof structuring would make sense since that was the main building material in that time. The forge will be made of bricks or large stones. I want to keep it more of a realistic feel but still have that old blacksmith shop from iron ages.
____________________________________
Front Loader

For this week the goal was to take a pre made model and apply textures within Substance Painter. During the process of adding layers to the model giving a more realistic and authentic appearance. To achieve this making multiply layers upon each other allow for build up of materials or what looks like rust, dirt, aging metal which are just a few ways adding layers can create realism.

In this model we had to bake the texture maps unlike usually we are given pre baked maps. Creating maps isn’t to hard just need to know where to go in the menus and once you find the Texture Settings this will allow you to delete or add maps. This allows for different shaders and materials to be applied independently of the other pieces.

One problem and more of a texturing problem was with the model was that some of the UV’s were stacked causing same light reflection while being on different parts but adding maps and layers can undo some of those mistakes. Otherwise, back to maya to fix or readjust UV levels.

Other than that I felt that the painting went very well I just wish I could get my alpha maps for making our name appear come out more clearly. Also, I would have liked to add some more rust to the bucket and underneath the model to show that it sat wherever it was for a long time. That is the one thing I enjoy Substance Painter being able to take a flat model and create a life like model without adding extreme amount of layers.

Dagger in Unity

During this week we needed to UV in Maya and texture in Substance Painter. Our dagger model was provided by Frank Pereira which helped with one less step in creating the entire project to simulate what would normal happen at a game studio. One team models the desired object and then it gets past down the line to the texturing team to give realism to the object. During the process the first steps where to UV the low poly dagger since that will be the main object in the scene, you do not need to UV the high poly since that will become the detailed map once it is brought into Substance Painter.
 After fitting the dagger into the desired resolution it is ready for Substance Painter. Once in there the low poly model is the object but our high poly model will be placed on top of the low model to give more detail without compromising performance in game engines. Once I painted the layers and masked everything out it was ready to be exported but since Unity only uses certain texture maps it doesn’t look as great as it does in Arnold. I think this is to save on performance and allow for more objects in the scenes.
 When going into Unity it is best to combine the object so once inside the game engine it recognize it has a whole object instead of 3 separate pieces. I did find it better inside of Arnold though I did have some problems with the reflectiveness of the object and for some reason the light is shining so brightly. Besides that I was able to slightly lower the shine and bring it back to normal. Having the models premade definitely moved the project by faster and let me focus more on how I wanted the dagger to look. Overall it was a good exercise that should masks and beveling tools to get the realism without a high poly count.
a


a
No comments:
Post a Comment